Practical food photography advice for restaurants and food brands, from lighting and chef coordination to menu, website and social formats.
Food photographs have a hard job. They need to make somebody hungry, show what they’re ordering and represent the experience honestly — sometimes in the space of a small thumbnail on a phone.
A beautifully lit dining room doesn’t guarantee an appetising picture of the dish, and a great plate of food can look flat under the wrong light. The best food shoots come from a bit of teamwork between the kitchen, photographer and whoever will be using the final images.
Whether you’re photographing a restaurant’s new menu, launching a food product or planning a campaign, these are the details worth getting right.
1. Decide where the photographs will be used
Start with the destination. A menu needs clear, recognisable dishes; a homepage may need a wide, atmospheric image; social platforms often work better with vertical or square compositions. Delivery-platform images may have specific content and crop requirements.
If the restaurant wants all of these, plan a shot list rather than expecting one hero photograph to fit every channel. The framing, styling and amount of surrounding space can be quite different.
2. Photograph the dish people will actually receive
There is a temptation to pile on ingredients, enlarge portions or alter colours until the food looks like an advert. That may create an eye-catching image, but it risks disappointing customers when the order arrives.
A useful food photograph should still be a fair representation of the actual dish. Take time over presentation, clean the rim of the plate and arrange components carefully, but don’t change the product beyond recognition.
3. Plan the lighting before the food arrives
Food can lose its best appearance quickly. Ice melts, sauces move, herbs wilt and hot dishes cool. The light should be ready before the chef plates the final version.
Soft side light often brings out texture without flattening everything. Window light can be beautiful when it’s consistent and controlled, while professional lighting may be more reliable across a long menu shoot or darker venue.
Avoid harsh direct light that creates distracting reflections on plates and sauces. But there isn’t one magic lighting formula: a bright bakery breakfast and a moody fine-dining campaign should feel different.
4. Work with the chef, not around them
A chef knows when a dish looks and tastes its best. Share the shooting order and explain roughly how long each set-up will take. That allows the kitchen to prepare ingredients sensibly and reduces the risk of wasted plates.
It’s helpful to have one person responsible for final styling decisions and another for approving the images against the actual menu. Too many last-minute opinions can slow the shoot and leave the kitchen waiting.
5. Choose the angle for the dish
Overhead works well for flat dishes, grazing boards, pizza and tables with several items. A three-quarter angle often suits plated restaurant meals. A lower angle can show height, layers or a stacked product.
There is no rule that every dish must be photographed at 45 degrees. The right angle is the one that makes the product clear and appetising. Take one good angle, then capture a variation if it would genuinely help the menu or campaign.
6. Keep styling natural and relevant
A little texture can improve an image: a linen napkin, a glass, cutlery or a simple background might make the setting feel more complete. But avoid covering the table in props simply because they photograph nicely.
If you’re selling a particular curry, cake or cocktail, the hero should still be easy to recognise. Choose props that make sense for the venue and food rather than generic items pulled from a studio shelf.
7. Think about colour and consistency
A whole menu photographed in wildly different lighting can make the website feel disjointed. Agree whether you want a bright, fresh style, a warm evening feel or a more editorial approach and keep the important elements consistent.
Colour accuracy matters too. A vibrant sauce shouldn’t become fluorescent, and meat, baked goods and vegetables shouldn’t be edited into unrealistic tones. Colour is part of how customers judge freshness and quality.
8. Include details, not just full plates
A restaurant’s visual story can include the texture of a crust, the finish of a dessert, a drink being poured or the chef adding a final garnish. These close-ups help build variety across a website and social campaign.
Use them to supplement the useful whole-dish shots. Somebody deciding what to order still needs to see the actual meal.
9. Photograph the experience around the food
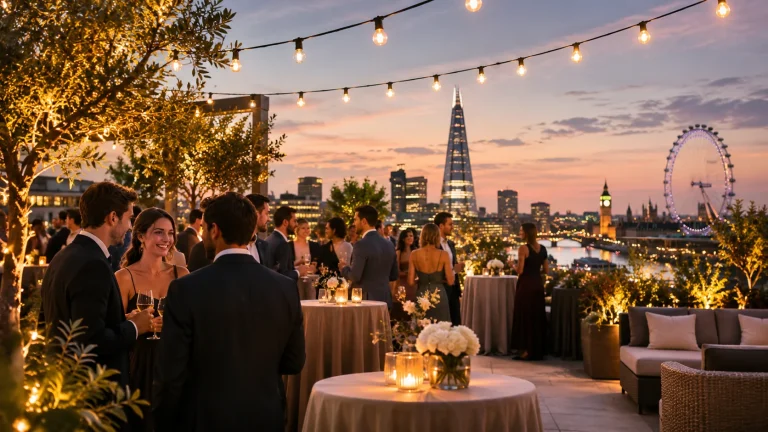
For restaurants, hospitality and hotels, atmosphere matters. People want to know what the venue feels like, whether it’s suitable for a date, a celebration, a working lunch or a family visit.
Mix dish photographs with carefully chosen images of the room, staff and service where permission is available. Empty interior images have a role, but a venue that looks warm and lived-in can be more inviting.
10. Capture a few useful social formats while you’re set up
A food-photography day is a good opportunity to create vertical stills and, where planned, short video clips. A pouring shot, finishing touch or small serving moment can work well as short-form content because viewers see the process as well as the final dish.
Make sure this is included in the brief. Film and photography use different techniques, crew time and sometimes lighting, so it shouldn’t be treated as an unlimited extra.
11. Plan around service times
A full restaurant may look atmospheric, but it’s rarely the easiest place to arrange plates, lights and equipment. Photographing before service can give the kitchen more control; a separate atmosphere session may be needed when guests are present.
If staff or diners are identifiable, agree appropriate permissions and privacy expectations in advance. For hospitality businesses, minimising disruption to paying guests is a practical priority.
12. Make sure the final files are usable
For each final image, ask what size, crop and resolution are needed. A large hero photograph, a booking-platform thumbnail, a printed menu and an Instagram Story won’t all use the same dimensions.
Agree how images will be named and delivered, which ones receive additional retouching and what usage rights are included. It can be useful to maintain a straightforward shot list with dish names, especially when several dishes look similar.
A simple food photography shoot plan
If a restaurant is updating ten menu dishes, a sensible starting approach could be:
Before the day: agree priority dishes, the backgrounds, kitchen timings, required formats and whether the venue itself needs photographing.
At the venue: set the lighting and camera position using a test plate before finished food is prepared. Photograph dishes in a practical order and check the images as you go.
Afterwards: select the best frames, check colours and the actual dish details, crop for the intended destinations and name the files clearly for the marketing team.
That’s a much better use of time than asking the chef to prepare everything at once and discovering afterwards that half the images are too dark or too tightly framed.
Should restaurants use phones or professional food photography?
Phones are useful for daily updates, spontaneous kitchen content and trying new ideas. The results can be perfectly good when the light and composition are right.
Professional photography becomes valuable when the business needs consistency across a whole menu, a new brand campaign, a venue launch or imagery that will be used for a long time. The decision isn’t about whether a phone can take a nice photo; it’s about whether the business has the time, technical control and consistency the project requires.
Our food and drink photography service covers planned commercial shoots for brands and venues.